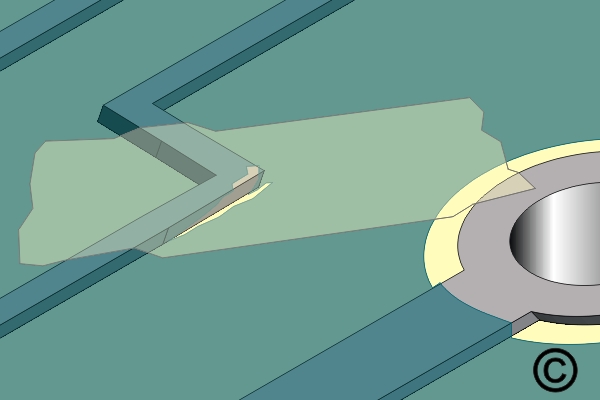
4.1.2 Lifted Conductor Repair, Film Adhesive Method
Rebond lifted conductors using film adhesive methods for precise, uniform adhesion. Includes surface preparation, heat control and pressure application for reliable trace restoration.
Minimum Skill Level: Intermediate
Conformance Level: High
REQUEST FOR QUOTE GUIDES INDEX