Millions are spent annually on the care and handling of circuit assemblies. Nevertheless, to the frustration of everyone involved, handling damage occurs.
Boards, components, and assemblies are dropped, bumped, nicked, and dinged with annoying regularity. Not long ago, we were presented with a board severely cracked from edge to edge.
One of the mighty international carriers ran over the box containing this board. That's right. It was run over with a truck.
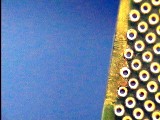
Believe it or not, even that level of damage can be fixed. When it comes to handling hiccups, far more common are the less traumatic impacts that cause less damage but nonetheless make affected assemblies worthless. For example, take a look at the damage in Photo 1.
Who knows how these things happen? Perhaps it goes down like this. Out on the floor, there's a loud bang, and everyone within hearing distance runs to check. Once the operator's safety is assured, the product is assessed, and if the stars are crossed, a board or assembly is found damaged. Oh boy, what do you do now?
Let's take a look at the possibilities. Repair policy differs from company to company; some will repair anything they can, and some allow no repair. Most companies have created some sort of repair and rework framework. Whenever considering repairs, you're well advised to determine if your company policy specifically addresses your needs.
Repair is often permitted, but the specifications for repair are not defined, or the type of repair is not even mentioned. That's where we can help.
In the case of the board in Photo 1, there is a set of instructions that can guide an experienced repair technician to bring the board back to an acceptable condition. Our website contains a "Guidebook" for this type of repair.
Base Material Repair, Epoxy Method
The steps listed provide basic instructions for any type of minor board laminate repair. I hesitate to mention the hated subject of dental work, but what a dentist does to restore a tooth is a great (though painful) analogy for this type of work.
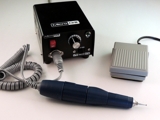
Like a tooth with a cavity, the damaged area has residual material that must be removed to stabilize the future repair. To remove weakened material, we typically use a precision micro-drill. We carefully grind out the residual damage to avoid damaging the base material unnecessarily.
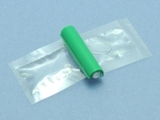
See Photo 3. The result of this grinding should be a clean surface that is tailor-made for epoxy repair. This is also when the patient finally relaxes in the chair, relieved of the nagging fear that the dental witch doctor will not drive a ball mill into the roof of his mouth.
Once the area is prepared and cleaned, epoxy is added - just like the filling material for a tooth. If needed, a color agent can be added to the epoxy for that perfect cosmetic match.
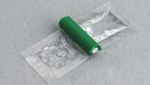
Lastly, the cured epoxy is sanded or filed to match the original edge profile. See Photo 5.
Baseboard damage is never good, but if it happens, it doesn't necessarily mean all is lost. There are reliable, approved procedures you can follow to put your valuable circuit boards back in play.
Several members of the Circuit Technology Center team contributed to this feature story. Images may be altered or recreated to protect proprietary information.