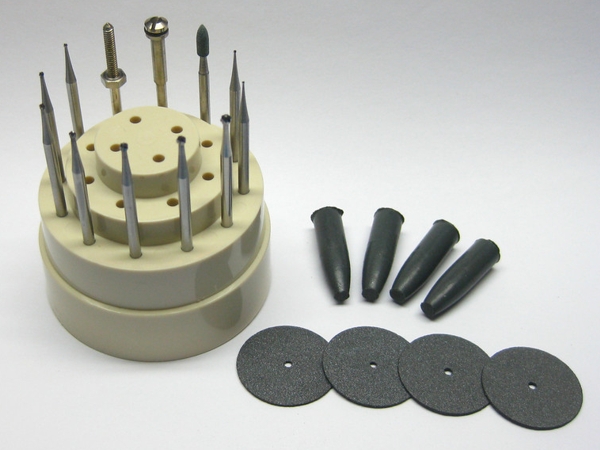
4.3.3 Deleting Inner Layer Connection at a Plated Hole, Drill Through Method
Outline
This method is used on multilayer circuit boards or assemblies to disconnect an internal connection at a plated hole. A Precision Drill System uses a carbide drill, end mill, or ball mill to drill out the hole. The hole may then be filled with epoxy and re-drilled to the diameter needed.
Caution: Extreme care must be taken to prevent damage to adjacent circuits. A microscope must be used during milling when extreme accuracy is required.
Minimum Skill Level - Advanced
Recommended for technicians with soldering and component rework skills and exposure to most repair/rework procedures, but lacking extensive experience.
Conformance Level - High
This procedure most closely duplicates the physical characteristics of the original, and most probably complies with all the functional, environmental and serviceability factors.
Cleaner
General purpose cleaner for removing contamination.
Continuity Meter
Meter and probes to test for electrical continuity.
End Mills
Designed for end cutting and hole boring.
Microscope
Precision microscope with stand and lighting for work and inspection.
Precision Drill
Precision drill press for accuracy and controlled depth drilling.
Wipes
Nonabrasive, low-linting wipes for cleanup.
Circuit Bond Epoxy
Circuit Bond is a clear, low viscosity, superior strength epoxy precisely measured out into two-compartment plastic packages, so it's easy to use, and there's no measuring. For over a decade, this high-strength epoxy has been qualified and used by thousands of high-rel electronics manufacturers across the globe.
1.
Circuit Bond has a working pot life of 30 minutes. It should not be mixed until ready to use.
2.
To use Circuit Bond, remove the plastic clip separating the resin and hardener. Squeeze back and forth from one half of the package to the other to mix the contents.
3.
Cut a corner off the package and squeeze all the contents into a Plastic Cup. Stir the contents to ensure it is thoroughly mixed.
4.
Circuit Bond may contain bubbles from the mixing process. If needed, use a vacuum system to remove bubbles.
5.
Color Agent can be mixed in with Circuit Bond to match surface colors if desired.
6.
Apply using a Foam Swab, Micro Probe, or Mixing Stick as required.
7.
Cure Circuit Bond for 24 hours at room temperature or 4 hours at 65°C (150°F).
Specifications
Packaging
2 gram pre-measured packages
Mix ratio
4 parts resin to 1 part hardener
Mix Ratio by Weight (R/H)
100/25
Color
Clear, transparent
Pot life
30 minutes
Cure cycle
24 hours at room temp (25 °C) or 4 hours @ 65°C
Thixotropic Index
1
Specific Gravity
1.20
Percent Solids
100%
Viscosity (after mixing)
2000 cps
Operating temperature range
-55°C to 135°C
Hardness
88 Shore D
Lap Shear, Alum to Alum
1100 psi
Glass Transition Temperature, Ultimate
92°C
Coefficient of Expansion, cm/cm/°C
6 E-05
Dielectric strength
400 volts/mil
Dielectric Constant, 1KHz@25°C
4
Shelf Life
6 months minimum
Color Agents
Color Agent is a one-part, air-drying, semi-paste ink commonly used to print hard surfaces, including circuit board base materials. Color Agent can be used to tint the color of epoxy used for solder mask repair or circuit baseboard repair. To use, mix a small amount of color agent with 2 part epoxy as the epoxy is initially mixed. Add more color agents to increase the color intensity if needed.
Figure 1: Precision Drill System with base plate to pin circuit board in position while drilling out plated hole.
Figure 2: Completely mill through the hole to isolate the internal connection(s).
Figure 3: Fill the hole with epoxy up to and flush with the surface.
Figure 4: Completed repair.
Procedure
Identify the hole that requires rework and clean the area.
Mark the coordinates on the board surface and pin the circuit board in place on the base plate of the Precision Drill System. (See Figure 1)
Select the appropriate size end mill, drill, or ball mill and insert it into the chuck of the Precision Drill System. The cutting tool should be approximately 0.50 mm (.020") greater than the plated through hole inside diameter. Set speed to high.
Caution: Abrasion operations can generate electrostatic charges.
Note: End mills are normally single-end, two or four-flute high-grade solid carbide.
Completely mill through the hole to isolate the internal connections. A microscope should be used for accuracy. (See Figure 2)
Blow away material with air and clean the area.
Check continuity to ensure the internal connection has been deleted. Also, check the continuity and inspect the neighboring circuits to make sure that none of them have been severed or damaged.
If desired, complete the following steps.
Mask the opposite side with High-Temperature Tape or a flexible mask to prevent the epoxy from flowing out the opposite side.
Mix the epoxy.
Fill the hole with epoxy up to and flush with the surface. Remove excess epoxy. (See Figure 3)
Note: A slight overfill of epoxy may be desired to allow for shrinkage when epoxy cures.
Cure the epoxy per Procedure 2.7 Epoxy Mixing and Handling.
Caution: Some components may be sensitive to high temperatures.
Clean the area.
Select an end mill or drill as needed. Insert the cutting tool into the Precision Drill System. Mill directly through the center of the cured epoxy. The surface pad remaining may be used as a target location for accuracy. A microscope should be used during milling for accuracy. (See Figure 4)
Caution: Be careful not to re-expose the internal layers of the hole when drilling out the epoxy.
Clean the area. Inspect the new hole using a microscope.