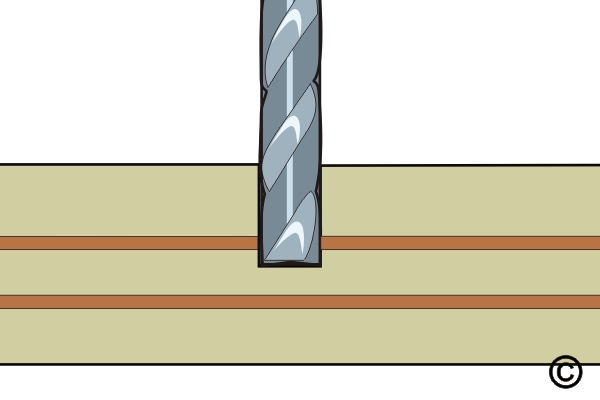
4.3.2 Circuit Cut, Inner Layer Circuits
Isolate inner layer connections using controlled access and cutting techniques. Includes laminate entry, trace interruption and restoration procedures.
Minimum Skill Level: Advanced
Conformance Level: High
REQUEST FOR QUOTE GUIDES INDEX