Solder mask has one primary purpose at a BGA site: to isolate solder wetting to a specific area, e.g., the BGA pad so that a good solder joint will be formed.
Solder mask usually isolates the pad from the conductor or the track leading to a via or plated hole. Sometimes, the track and hole are completely masked; sometimes, there is only a thin "dam" of mask between the pad area and the exposed track and hole. This dam or masking is delicate and easily damaged or dislodged during rework. If it isn't repaired, the result is often more rework or rework upon rework!
Once a BGA device is removed from a site, that site must be prepared before the replacement process. Preparing usually involves removing residual solder from the BGA pads on the circuit board, typically done with a soldering iron and copper braid solder-wicking material. Then, the rework area is cleaned.
Once cleaned, fresh solder is added to the BGA pad sites by dispensing solder paste, stenciling solder paste through a mini-stencil, or pre-bumping the pads with solder. A new BGA component is finally placed at the site, and the site and BGA are heated to reflow the solder and make a new connection.
If the solder mask around any of the individual BGA pads was damaged during board preparation, there's a strong chance that the new solder placed on that pad will simply flow down the track and potentially into the plated via hole. This will often leave insufficient solder on the pad to form a new solder joint, resulting in either an insufficient or "starved" solder joint or an open.
There is no simple remedy. You will need to remove the new BGA component and start over. The circuit board also risks damage through multiple thermal cycles, reworking the same area. If the new component must be removed, that removal will be at least the 4th time that the site has been exposed to reflow temperatures.
Even the most careful operator can damage the solder mask during board preparation. Heating, plus the slightly abrasive action of wicking solder or cleaning the area, can damage the solder mask. That's why it is important to inspect the solder-masked areas of the site carefully once the board has been cleaned. Where the solder mask has been peeled or broken away, it must be replaced.
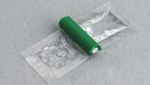
Loose pieces should be scraped off (See Figure 1). Once the solder has been cleaned from the site, it is important to scrape any remaining solder from the surface of each trace, exposing the copper. The site can then be cleaned and encapsulated with a replacement solder mask or epoxy. We typically use two-part epoxy instead of a replacement solder mask.
We've occasionally seen the solder bleed underneath the epoxy and flow down the trace to the via without this scraping. This replacement epoxy should be applied with a fine needle dispenser. Sometimes, even that is too much; our operators sometimes use a thin needle dipped into the epoxy and then painted across the track to re-create the mask dam. (See Figure 2). This takes skill and a steady hand.
Following the mask's application, the circuit board must be baked in strict accordance with the epoxy specifications to ensure a proper cure. New solder can be applied to the BGA site, the new BGA component placed on the board, and the site reflowed.
The process of replacing solder masks at BGA sites is time-consuming and meticulous. There is no quick or easy way around it.
Several members of the Circuit Technology Center team contributed to this feature story. Images may be altered or recreated to protect proprietary information.